Manage your team
Invite teammates to your Deskbolt agency, give them a role (Admin, Manager, or Agent), and adjust their access over time. The Team page lives under Settings → Team and is only accessible to Admins.
This page covers four common workflows: opening the Team page, inviting new teammates, managing existing members, and reading the role permissions reference.
Who can access the Team page?
Only users with the Admin role can see and use Settings → Team. Managers and Agents will not see this menu entry — and won't be able to access the URL directly either.
| Role | Can open Team page? | Can invite / promote / remove? |
|---|---|---|
| Admin | ✅ | ✅ Full control |
| Manager | ❌ | ❌ |
| Agent | ❌ | ❌ |
You are the person who first signed up for your agency on Deskbolt. Each agency has at least one Admin. You can promote a Manager to Admin later — see Promote a Manager to Admin.
Open the Team page
- Log in to deskbolt.com
- In the left sidebar, expand Settings, then click Team
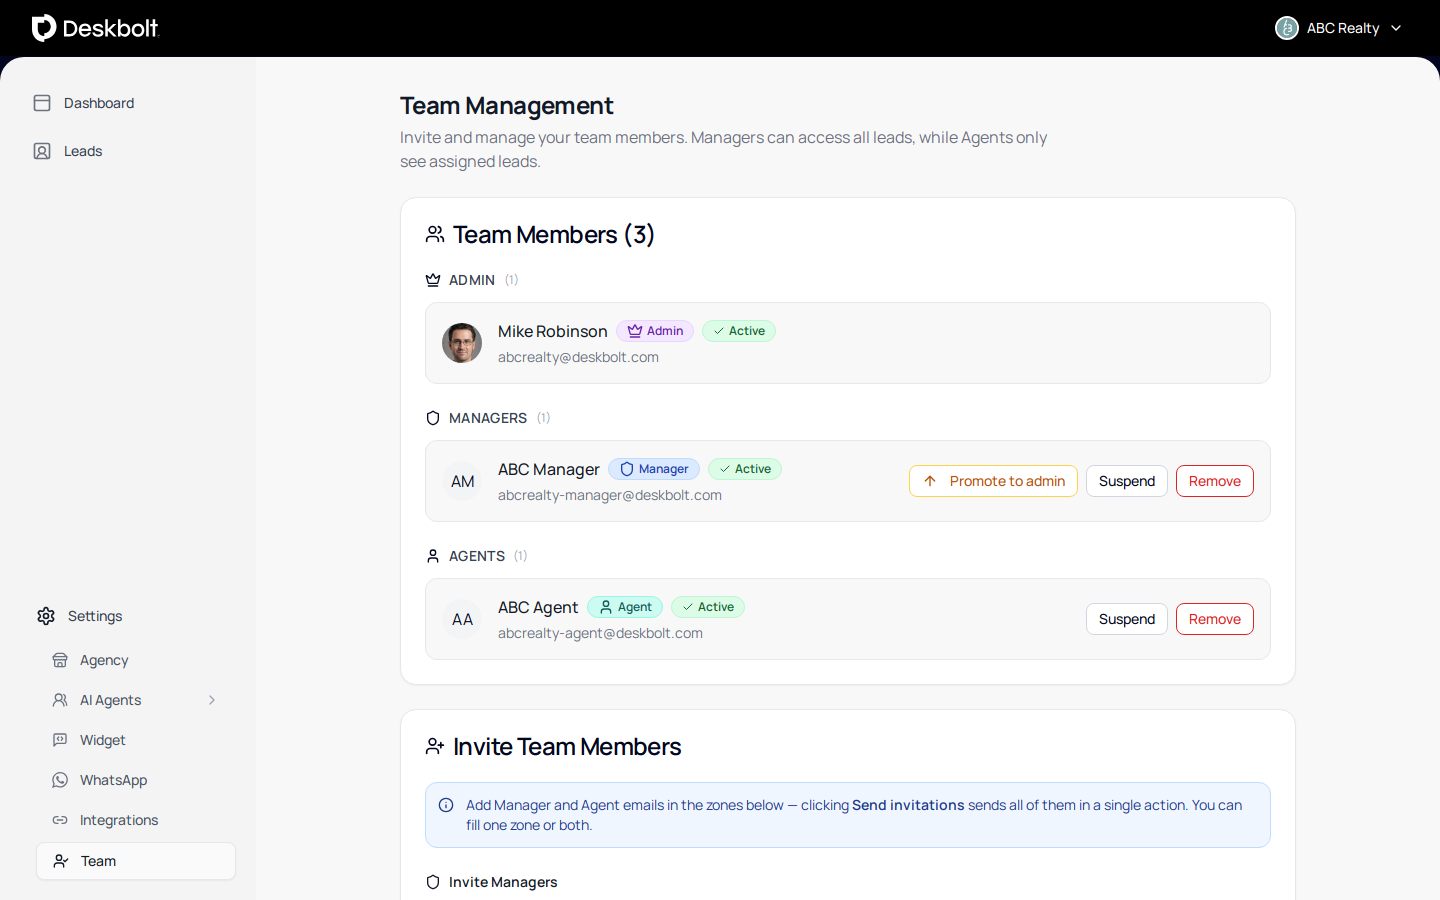
The Team page is split into three sections, top to bottom:
- Team Members — everyone currently on the team, grouped by role
- Invite Team Members — bulk-invite new managers and agents
- Role Permissions — quick reference of what each role can do
Invite teammates
You invite teammates by email. They will receive a sign-up link, and their account is created with the role you assigned.
- Scroll to Invite Team Members
- Paste Manager emails in the first textarea (one per line)
- Paste Agent emails in the second textarea (one per line)
- Click Send invitations (bottom right)
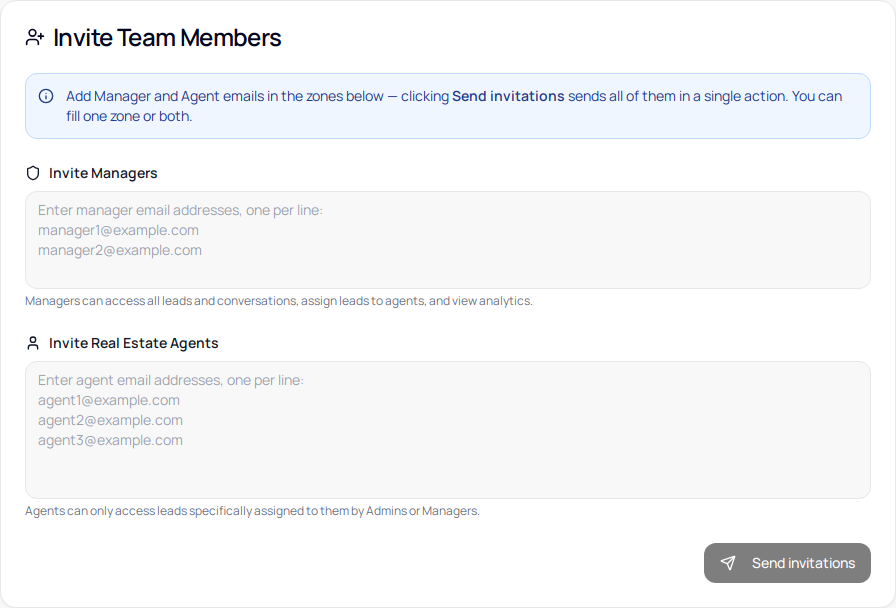
You can fill one zone or both. A single click sends every queued invitation in one action.
The textareas accept one email per line. Spaces, commas, or semicolons inside a line are treated as a single (invalid) entry. If a line is empty, it's skipped.
Before sending, Deskbolt checks each address. You'll get an amber alert if any of the entries is:
- Invalid — not a valid email format
- Duplicated in the same zone, or across the two zones
- Already a team member of your agency
- Already invited (a pending invite exists)
Fix the flagged lines, then click Send invitations again.
After sending, each invited address receives an email with a personal sign-up link. You can see the queued invites in the Pending Invitations card (above the invite form, when at least one is pending). Pending invites display the assigned role and the expiry date — click the cancel button to revoke an invite before it's accepted.
Manage existing members
Each row in the Team Members card shows the member's name, email, role badge, and current status (Active or Suspended).
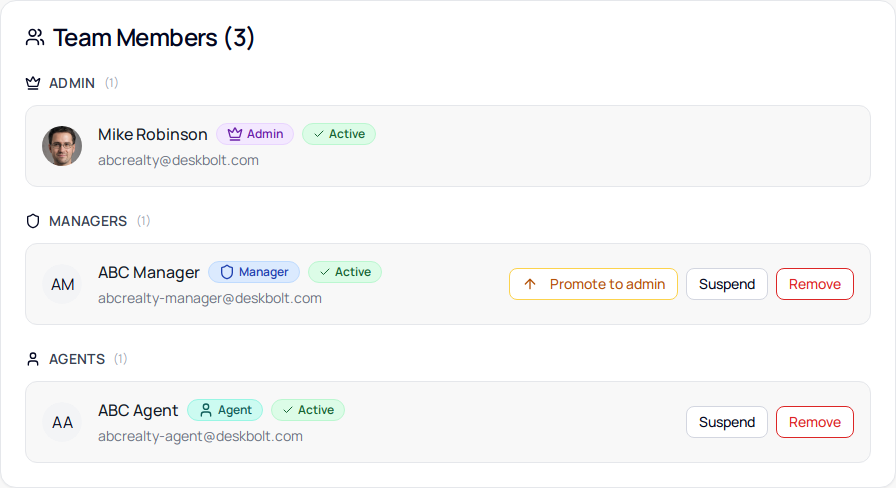
Three actions are available on the right-hand side of each row, depending on the role:

Promote a Manager to Admin
Click Promote to admin on a Manager's row. The Manager becomes an Admin and immediately gains full access to all settings, including the Team page itself.
Promote when a Manager needs to invite teammates or change permissions on your behalf — for example when you go on vacation or want to share Admin duties.
Demote an Admin to Manager
Click Demote to manager on an Admin's row. The Admin becomes a Manager and loses access to Team management and a few Settings pages — but keeps full lead access.
You cannot demote your own Admin account. If your agency has only one Admin, promote a Manager first, then ask the new Admin to demote you.
Suspend a member
Click Suspend. The member is signed out and cannot log in until you reactivate them. Their data is preserved (assigned leads, conversations, etc.) — nothing is deleted.
Use Suspend for temporary access removal — for example a teammate going on extended leave, or while you investigate a suspicious sign-in. Use Remove when the person is leaving the agency for good.
To reactivate, click Reactivate on the suspended row.
Remove a member
Click Remove. The member is permanently deleted from your agency. This cannot be undone.
Lead assignments held by the removed member are released back to the agency pool. Conversations they participated in remain in the team's history, but the member's profile is gone. To regain access for that person later, send them a new invite from scratch.
Role permissions reference
The bottom card on the Team page summarizes what each role can do. Use it as a quick reminder when you're unsure which role to assign a new teammate.
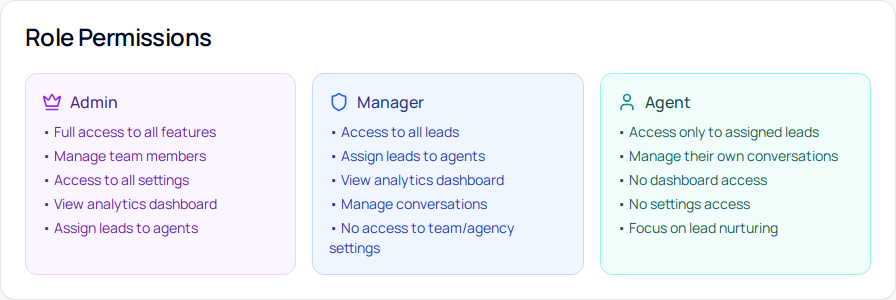
When to use each role
- Admin — owners, partners, anyone who needs to manage the team or change agency-wide settings
- Manager — team leads who handle all leads and conversations but don't need to manage teammates or billing
- Agent — frontline real estate agents, who only see leads assigned to them and focus on lead nurturing
You can change a member's role at any time from the Team Members section.
Need help?
Email support@deskbolt.com — include your agency name and a description of what you tried. We usually reply within a few business hours.